The following section describes the loading of the SAP extraction data into Tableau Analytics Platform.
The Tableau Destination enables you to save data extracted from SAP as Hyper files.
It is also possible to upload the Hyper file to Tableau Server or Tableau Online.
Requirements #
- Tableau Export Library
- Visual C++ 2015 Runtime
Download the Tableau Export Library and Visual C++ 2015 Runtime here.
If no Visual C++ 2015 Runtime is installed on your machine, run the vc_redist.x64.exe to install the Visual C++ 2015 Runtime.
Copy the tableau folder into your Xtract Universal directory so that the following folder structure is created: C:\Program Files\XtractUniversal\tableau\hyper.
Connection #
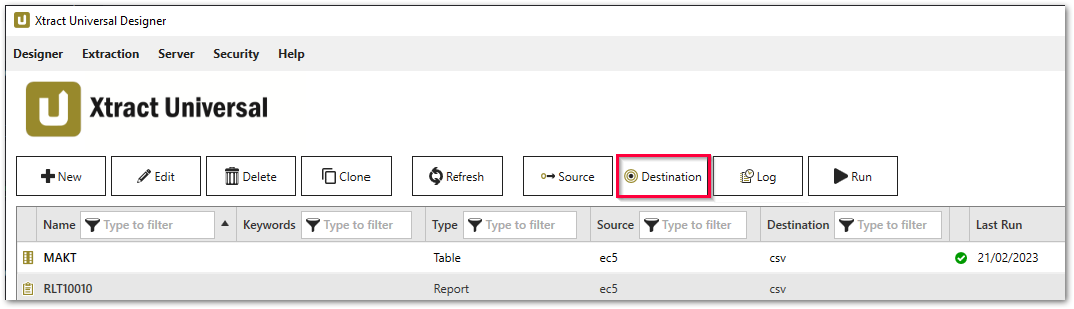
Adding a Destination #
- In the main window of the Designer, navigate to Server > Manage Destinations. The window “Manage Destinations” opens.
- Click [Add] to create a new destination. The window “Destination Details” opens.
- Enter a Name for the destination.
- Select the destination Type from the drop-down menu.
Destination Details #
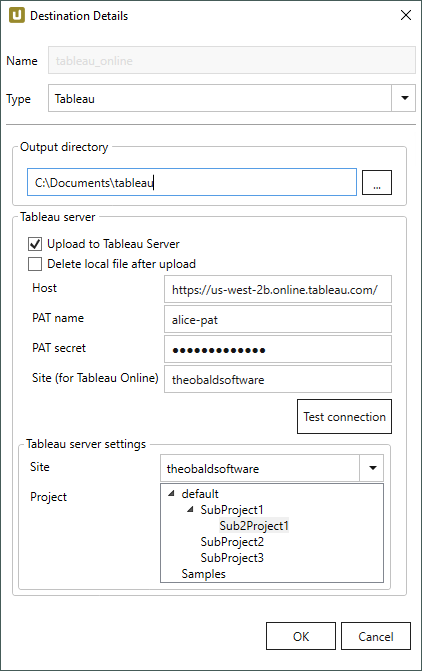
Output directory #
Enter the directory on the Xtract Universal Server to store the generated Tableau files in.
Note: Make sure that the directory exists.
Tableau Server #
Upload to Tableau Server
Option to upload the extracted file (as a data source) to Tableau Server or Tableau Cloud.
Delete local file after upload
Option to remove the local file after a successful upload.
Host
Enter the IP address or domain name of the remote server, starting with http:// or https://.
PAT name
Enter the name of your Personal Access Token (PAT).
To extract data to Tableau Server the site role “Server Administrator” is required.
PAT secret
Enter a valid token secret that corresponds to your token name.
Site (for Tableau Cloud)
Enter the ID of the site for publishing your data source.
This field is mandatory and cannot be left blank.
Get the correct site URL from Tableau Cloud.
[Test Connection]
Check the database connection.
Tableau Server Settings #
Site
A drop-down list of the sites stored on the connected on-prem server. Selecting a site is mandatory for uploading files.
Project
Select the project in which the extracted data is published.
Settings #
Opening the Destination Settings #
- Create or select an existing extraction, see Getting Started with Xtract Universal.
- Click [Destination]. The window “Destination Settings” opens.
The following settings can be defined for the destination:
Destination Settings #
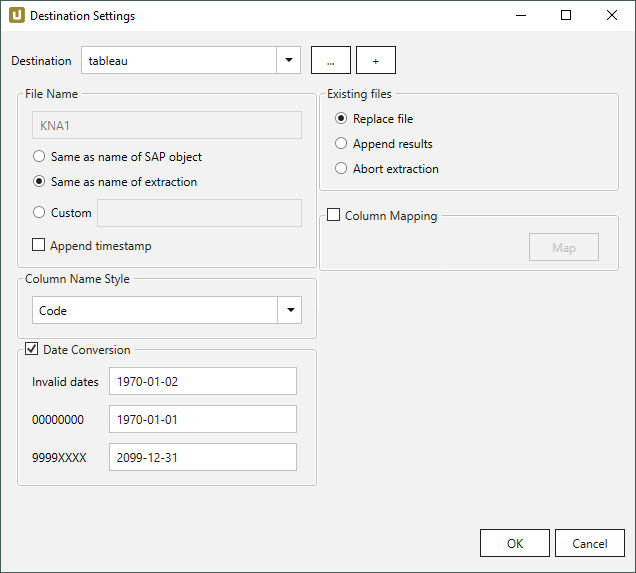
File Name #
File Name determines the name of the target table. You have the following options:
- Same as name of SAP object: Copy the name of the SAP object
- Same as name of extraction: Adopt name of extraction
- Custom: Define a name of your choice
- Append timestamp: Add the timestamp in the UTC format (_YYYY_MM_DD_hh_mm_ss_fff) to the file name of the extraction
Column Name Style #
Defines the style of the column name. Following options are available:
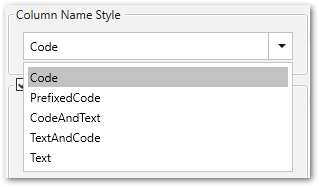
- Code: The SAP technical column name is used as column name in the destination e.g., MAKTX.
- PrefixedCode: The SAP technical column name is prefixed by SAP object name and the tilde character e.g., MAKT~MAKTX
- CodeAndText: The SAP technical column name and the SAP description separated by an underscore are used as column name in the destination e.g., MAKTX_Material Description (Short Text).
- TextAndCode: The SAP description and the SAP technical column name description separated by an underscore are used as column name in the destination e.g., Material Description (Short Text)_MAKTX.
- Text: The SAP description is used as column name in the destination e.g., Material Description (Short Text).
Date conversion #
Convert date strings
Converts the character-type SAP date (YYYYMMDD, e.g., 19900101) to a special date format (YYYY-MM-DD, e.g., 1990-01-01). Target data uses a real date data-type and not the string data-type to store dates.
Convert invalid dates to
If an SAP date cannot be converted to a valid date format, the invalid date is converted to the entered value. NULL is supported as a value.
When converting the SAP date the two special cases 00000000 and 9999XXXX are checked at first.
Convert 00000000 to
Converts the SAP date 00000000 to the entered value.
Convert 9999XXXX to
Converts the SAP date 9999XXXX to the entered value.
Existing files #
Replace file: The export process will overwrite existing files.
Append results: The export process will append new data to an already existing file.
Abort extraction: The process will be aborted if the file already exists.
Column Mapping #
Activate Column Mapping when appending data to an existing file or entity that has different column names or a different number of columns.
This can be the case when extracting data from two or more extractions into the same destination file, where the column names of the extraction and the destination file differ.
Note: The column names in the extraction and destination must be unique. If duplicated column names are found, an error message is displayed. The column names must be corrected, before column mapping can be used.
- When working with flat files, ensure that:
a) the XU server and the Designer both have access to the destination file.
b) the output directory and the file name of the extraction match the destination file.
c) the Column Name Style of the extraction and destination file match. - Select the option Append results in the section Existing Files.
- Click [Map] to assign columns. The window “Column Mapping” opens.
Destination Columns displays the names of the columns that are available in the destination file or entity. Not Mapped defines whether or not columns are mapped to the destination columns. Source Columns defines which SAP column is mapped to a destination column.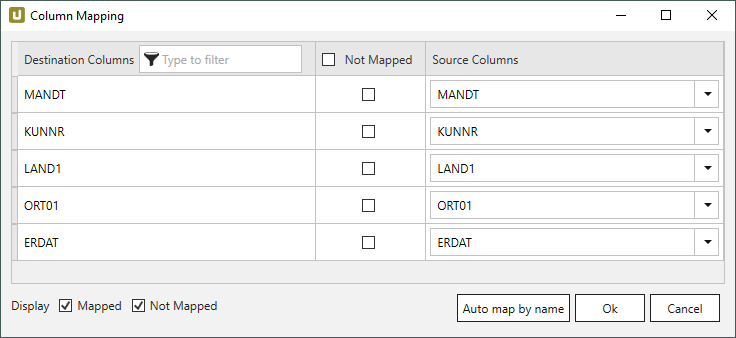
- a) If the column names of the extraction and the names of the destination columns match, click [Auto map by name].
b) If the column names do not match, assign columns manually by selecting the respective SAP column from the dropdown menu under Source Columns.
c) If a column does not have a counterpart or is not supposed to be appended, activate the checkbox under Not Mapped. - Click [OK] to confirm your input.
When running the extraction the extracted data is added to the destination file or entity as specified in the column mapping.
Tip: In case an error message pops up, click [Show more] to see a description of what caused the error.
Note: Columns that are not mapped are filled with NULL values.