The following section describes the loading of the SAP extraction data into a Custom list on a SharePoint server.
Requirements #
To extract data into a SharePoint Custom list, you need either your own SharePoint server or access to a SharePoint Online system as part of Office365.
If your SharePoint server isn’t configured for remote access already, go to Central Administration -> Application Management -> Configure alternate access mappings and add an appropriate mapping for the zone “Internet”.
Connection #
Adding a Destination #
- In the main window of the Designer, navigate to Server > Manage Destinations. The window “Manage Destinations” opens.
- Click [Add] to create a new destination. The window “Destination Details” opens.
- Enter a Name for the destination.
- Select the destination Type from the drop-down menu.
Destination Details #
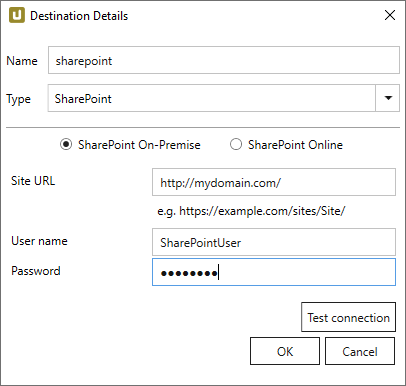
SharePoint on-premises or SharePoint Online
Select the type of SharePoint environment you are going to export to.
Site URL
Enter the URL of your SharePoint server here (optionally including sub-directories if you want to export into a specific site on the server).
Make sure you only enter the base path, omit page information a browser might show you in the address line like _layouts/15/start.aspx#/ or similar.
User
Enter your SharePoint user name.
Password
Enter the password for your SharePoint user account.
Test connection
Check the database connection.
Settings #
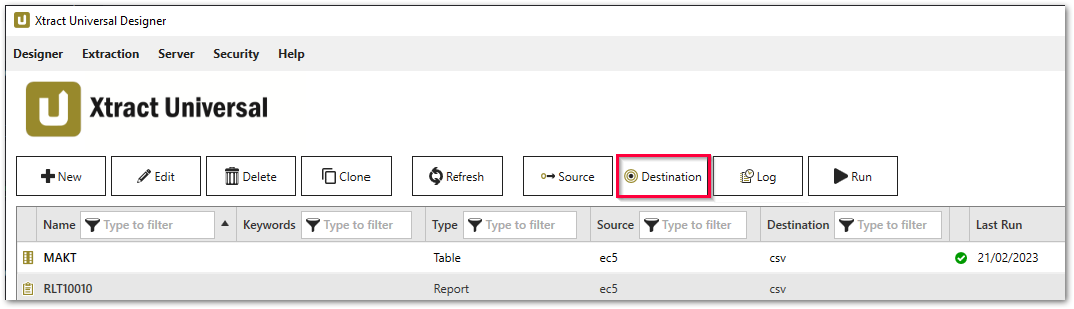
Opening destination settings #
- In the main window of the designer choose the extraction with the destination type SharePoint.
- Click [Destination]. The window “Destination Settings” opens.
The following settings can be defined for the destination:
Destination Settings #
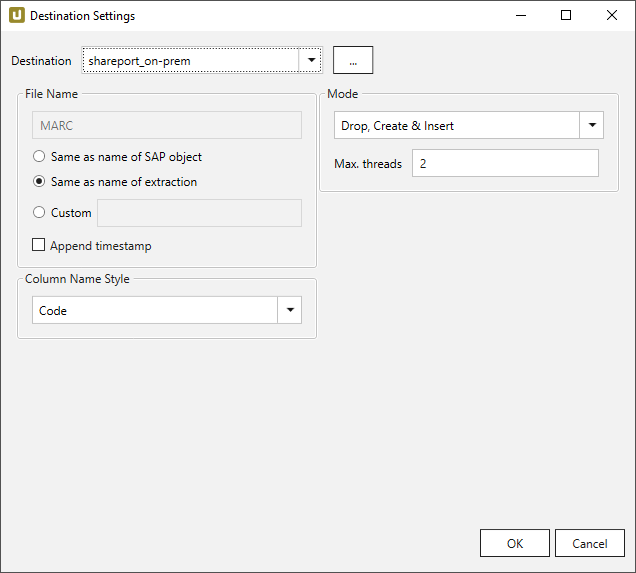
File Name #
File Name determines the name of the target table. You have the following options:
- Same as name of SAP object: Copy the name of the SAP object
- Same as name of extraction: Adopt name of extraction
- Custom: Define a name of your choice
- Append timestamp: Add the timestamp in the UTC format (_YYYY_MM_DD_hh_mm_ss_fff) to the file name of the extraction
Column Name Style #
Defines the style of the column name. Following options are available:
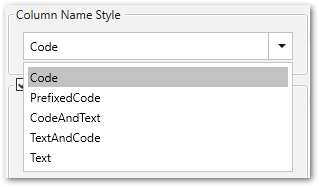
- Code: The SAP technical column name is used as column name in the destination e.g., MAKTX.
- PrefixedCode: The SAP technical column name is prefixed by SAP object name and the tilde character e.g., MAKT~MAKTX
- CodeAndText: The SAP technical column name and the SAP description separated by an underscore are used as column name in the destination e.g., MAKTX_Material Description (Short Text).
- TextAndCode: The SAP description and the SAP technical column name description separated by an underscore are used as column name in the destination e.g., Material Description (Short Text)_MAKTX.
- Text: The SAP description is used as column name in the destination e.g., Material Description (Short Text).
Mode #
- Drop, Create & Insert: Creates a new list on the SharePoint system, deleting any previous list with the same name.
- Create if not exists & Merge: Merges data with an existing list or creates a new list, if none with the specified name is found.
- Truncate & Insert: Deletes all rows in the list and fills it with the new exported data. It differs from “Drop, Create & Insert” by not deleting the list or any associated information.
- Merge only: Merges rows, without deleting rows or the list itself
- Max. threads (expert option): Sets the number of threads for communication with the SharePoint server.
Note: Increasing the thread number may increase the upload speed, depending on the server and network setup. Setting the value to 1 slows down the speed significantly, which may help with a heavy load of the SharePoint server or when connection problems occur.
Recommendation: Keep the default value (2) for Max. threads.