Warning: Deprecated documentation
You are using the old version of the online help for yunIO.
Make sure to use the documentation within the new HelpCenter for yunIO.
The following section shows how to test, integrate and pass parameters to services created in yunIO.
Testing a Service #
Before integrating a service, test the service directly in yunIO or a REST client of your choice.
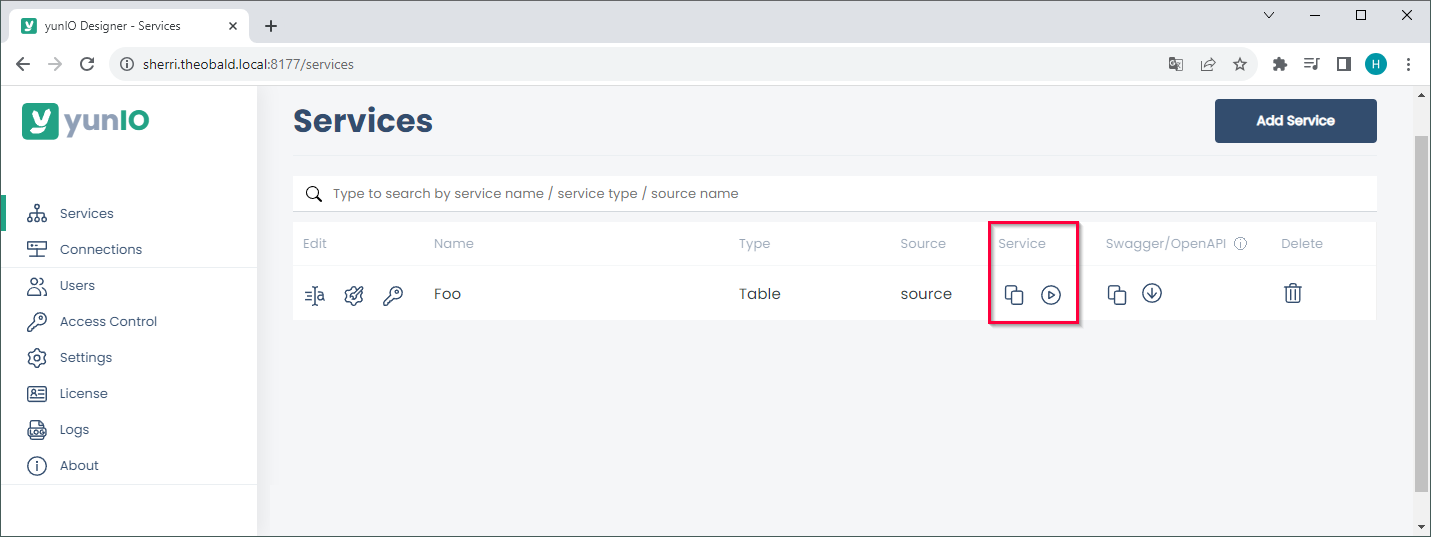
- Click
 to copy the URL of the service endpoint to your clipboard. The URL can be used to trigger a service run.
 - Click
 to open the Run Service menu, where you can define parameters and run the service directly in yunIO.
Running Services in yunIO
Follow the steps below to testrun a service in yunIO:
- If Global Access Control and/or Service Access Control is enabled, enter valid credentials (1).
- If the service requires input parameters, enter values for the parameters listed under Input Parameters (2). Use the [ + ] button to display nested items.
The depicted example uses an input parameter NAME.
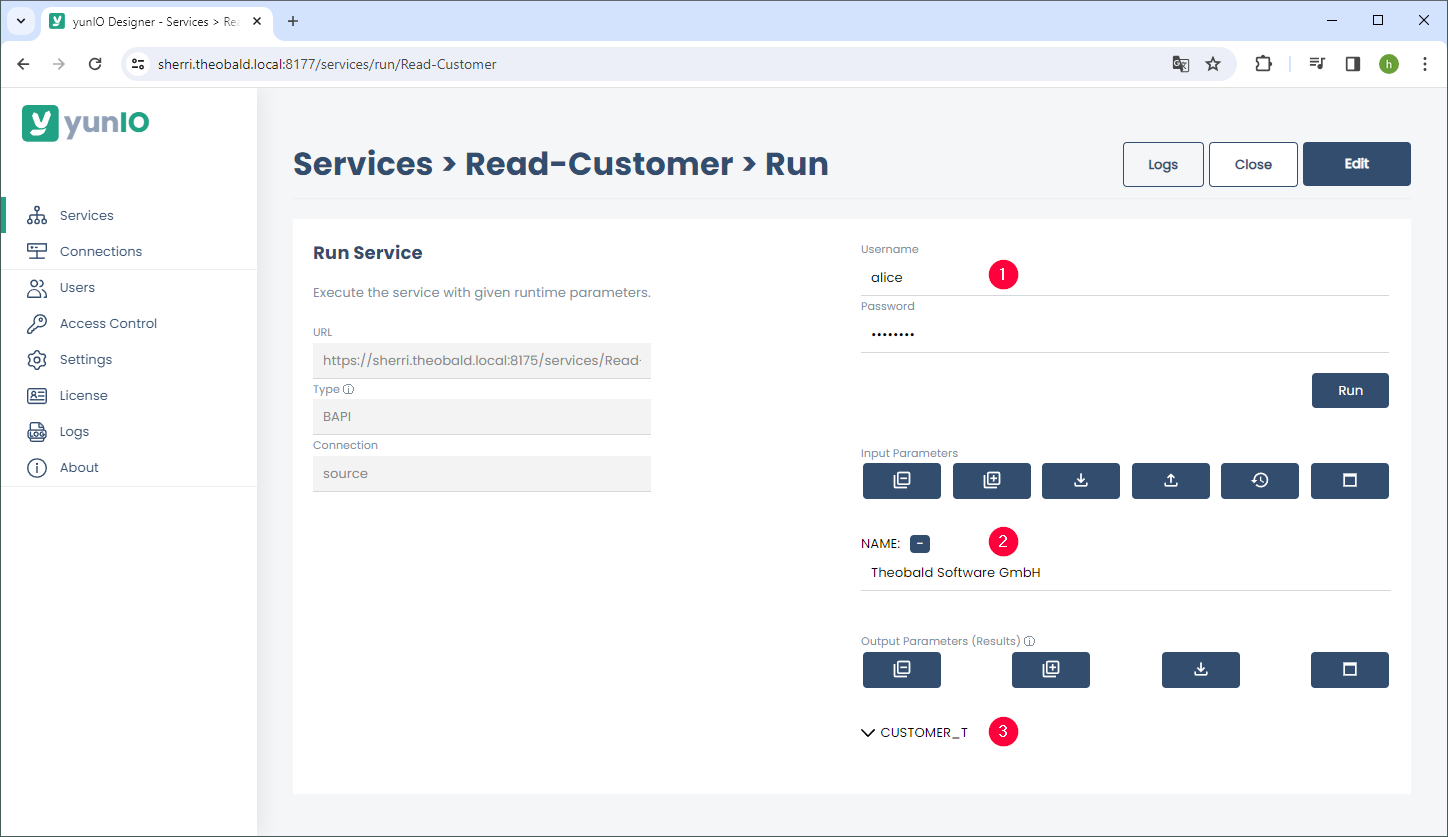
- Click [Run]. The response body of the service is displayed under Output Parameters (3).
If the service returns multiple items, expand the items to view the content or use the control buttons to adjust the display of the parameters.
If the response body returns an error message, click [Logs] to open the logs of the service run. - Click [Close] to close the Run Service menu.
Tip: Click [Edit] to edit the service or add parameters.
Control Buttons:
The control buttons within the Run Service menu regulate the display of input and output parameters.
- [
 ] collapses all parameter items.
  expands all parameter items.
 saves all entered parameters in a .json file. The file can be used to reload the parameter values or to share values with other yunIO instances.
 uploads parameter values from a local .json file. The json file can be created using the button.
 removes all defined input parameters. This option is only available for input parameters.
 displays the parameters in a full screen view. To close the full screen view, click [ X ].
Integrating a Service #
Web services created with yunIO can be integrated into all cloud applications that support REST API/Swagger (OpenAPI), e.g. Power Automate, Nintex, etc.
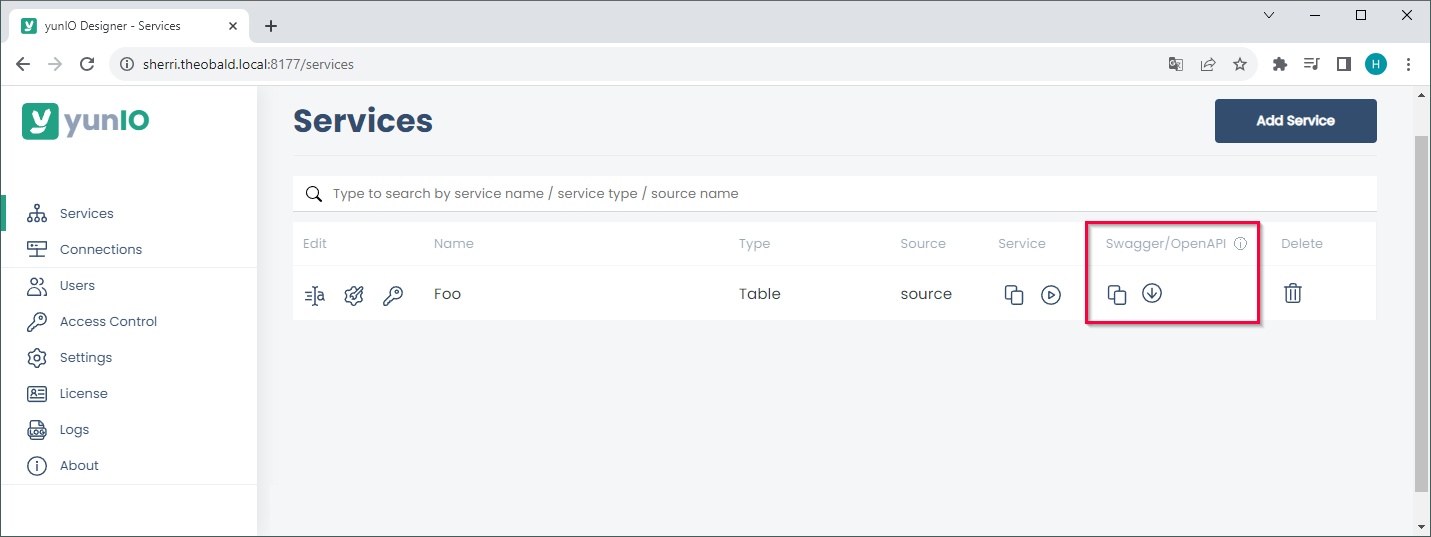
- Click to copy the URL of the service definition to your clipboard.
The service definition URL can be used by third-party-tools to load the meta data of the service. - Click
 to download the service definition.
The service definition is saved as a JSON file that defines how to run the service. The JSON file can be imported into third-party tools.
Examples for integrating yunIO services in third-party-tools:
- Integrating a yunIO Service with Power Automate
- Integrating a yunIO Service with Nintex
- Integrating a yunIO Service with Alteryx
For more integration scenarios and examples, see Integration Scenarios.
Passing Parameters #
How parameters are passed to a yunIO service, depends on the http method that is used to call the service.
yunIO supports the http methods POST and GET, see POST vs GET.
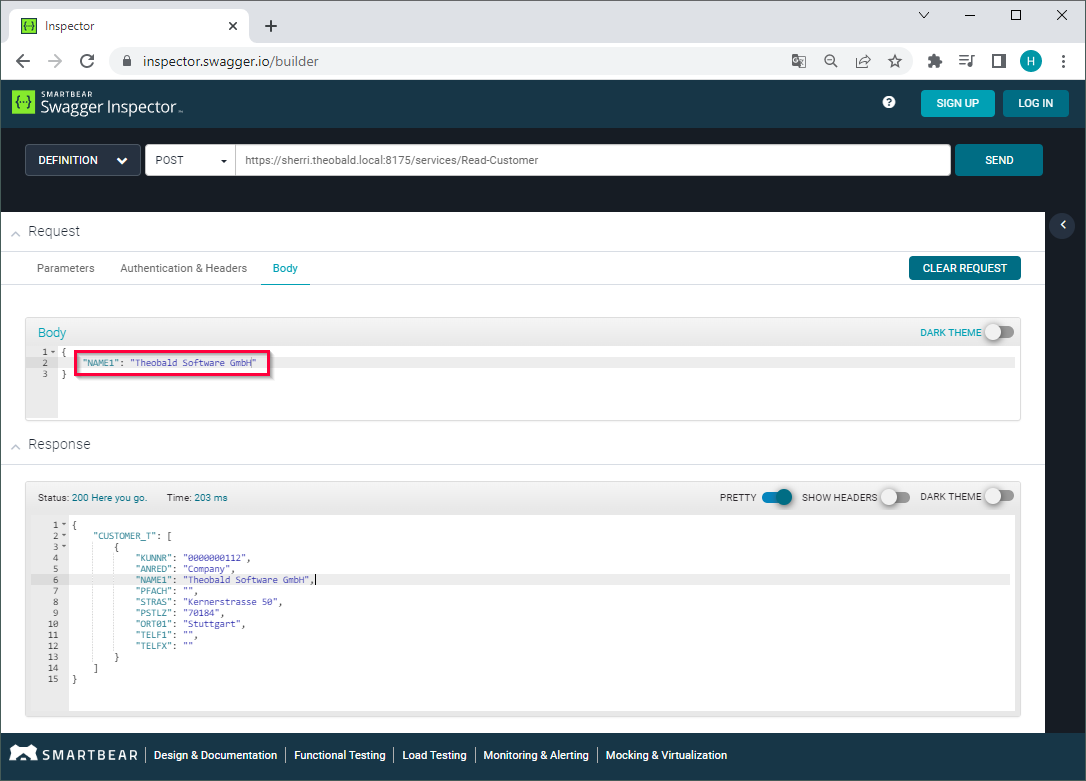
POST Method
Parameters are listed in the request body of a service.
Edit the request body to assign values to the parameters. The depicted example uses an input parameter NAME1:
GET Method
Parameters are available as query parameters in the service URL.
Use query parameters to assign values or add the values directly in the service URL. The depicted example uses an input parameter NAME1:
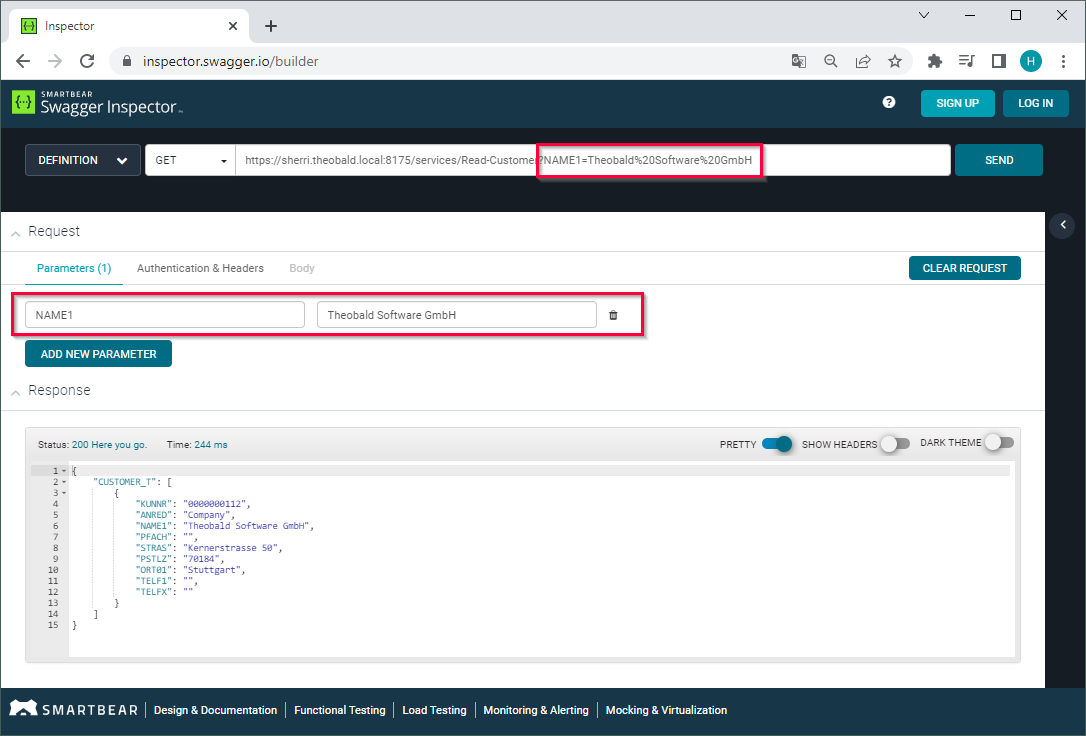
Note: If URL parameters contain characters other than A–Z a–z 0–9 - _ . ! ~ * ' ( ) use an escape sequence for the characters. Some characters can break the URL, e.g., # % &.
POST vs GET #
yunIO services support the http methods POST and GET.
| POST | GET | |
|---|---|---|
| Data Length | No restrictions. | Maximum URL length is 2048 characters. |
| Parameters | Parameters are part of the http request body. | Supports query parameters in the URL. |
| Data Safety | Parameters are not stored in the browser history or in web server logs. | Parameters are visible in the service URL. Data is cached. |
| Data Types | No restrictions. | Only supports ASCII characters. |
Recommendation: We recommend using the POST method with Transport Layer Security (HTTPS) to ensure data protection. Do not use the GET method to send sensible data, e.g. credentials.
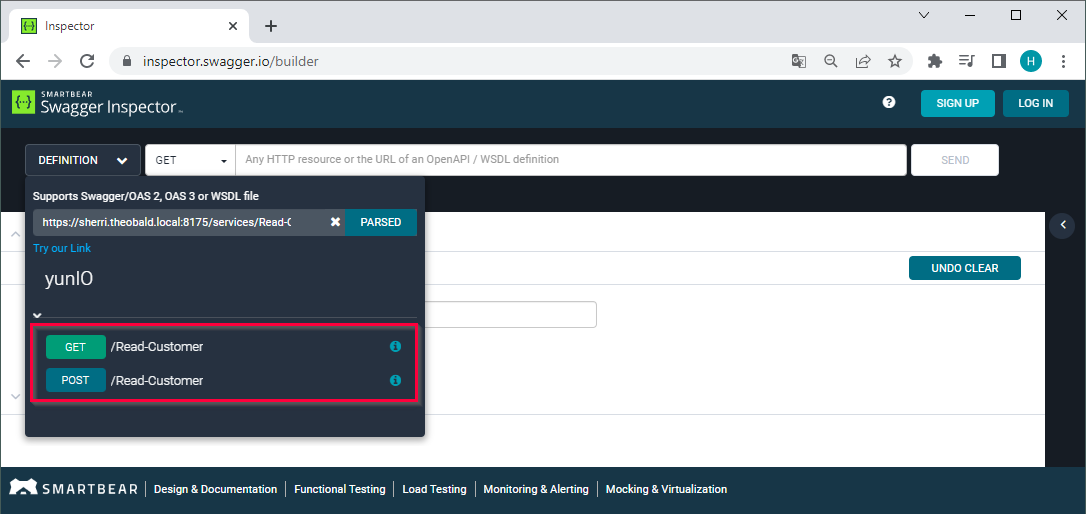
When using the OpenAPI/Swagger definition, POST and GET are both available. Select the method you want to use: