A destination defines how the extracted SAP data is processed. This could be a conversion to file-based formats for local or cloud-based file systems or to deliver the data to targets like databases and other APIs. For a complete list of available destinations, see Destinations.
Creating a new Destination #
Follow the steps below to create a new destination:
- In the main window of the designer, open the menu [Server] > [Manage Destinations]. The window “Manage Destinations” opens.
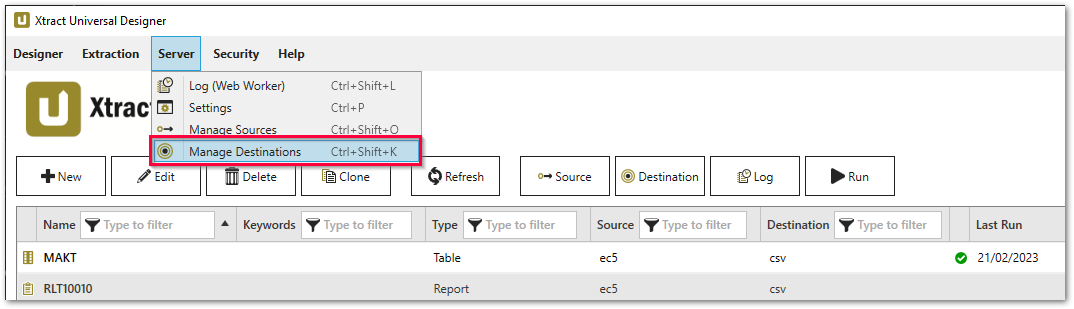
- Click [Add] (1) to create a new destination. The window “Destination Details” opens.

- Enter a unique name for the destination (2).
- Select a destination type from the drop down list (3). The destination details are displayed.
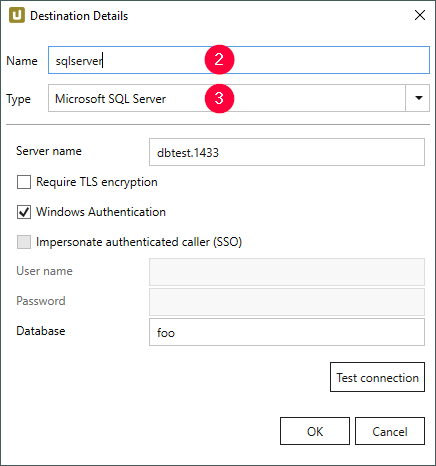
- Fill out the destination details. The destination details vary depending on the destination type.
For more information about the destination details, select your destination: - Click [Test Connection] to check the connection to the destination.
- Click [OK] to save the destination.
The destination is now available and can be assigned to extractions.
Assigning Destinations to Extractions #
Extractions write data to their assigned destination. Follow the steps below to assign a destination to an extraction:
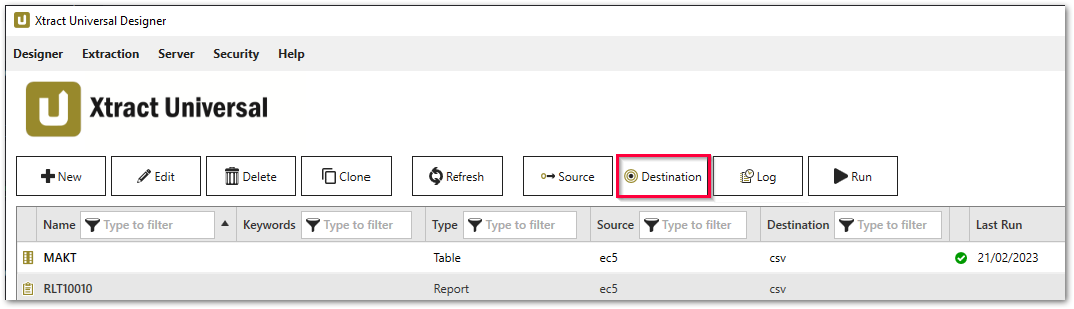
- In the main window of the designer, select an extraction.
- Click [Destination]. The window “Destination Settings” opens.
- In the “Destination Settings” window, select a destination from the drop down menu.
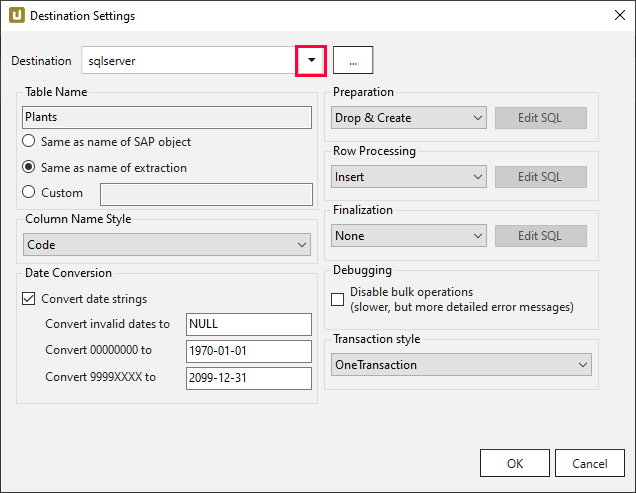
- Optional: change the destination settings.
Destination settings are specific to the selected extraction and vary depending on the destination type.
For more information about the destination settings, select your destination: - Click [OK] to confirm your input.
When running the extraction, the extracted SAP data is now written to the destination.