For Transport encryption and authentication it is required to install an X.509 certificate.
There are two main approaches for creating an X.509 certificate:
- Certificate released by an (internal) certification authority (CA)
- Self-signed certificate
Note: On test environments you can use a self-signed certificate. For production environment it is recommended to use a certificate released by an (internal) certificate authority (CA).
Create X.509 Certificate #
Make sure to have a TLS certificate issued by your IT network team considering the following points:
- The certificate property “Subject Alternative Name” contains the DNS name of the server on which the Windows service (e.g. Xtract Universal Service or Board Connector Service) is running.
- Place the certificate in the Windows Certificate Store on the machine, on which the Windows service is running.
- The certificate common name (CN) attribute contains the DNS name of the server.
Tip: To display the Common Name (CN) of the certificate, double-click the certificate in the Cetrificate Manager and navigate to the Details tab.
Integrate X.509 certificate #
- Import the certificate to the Windows Certificate Store using Microsoft Management Console (mmc).
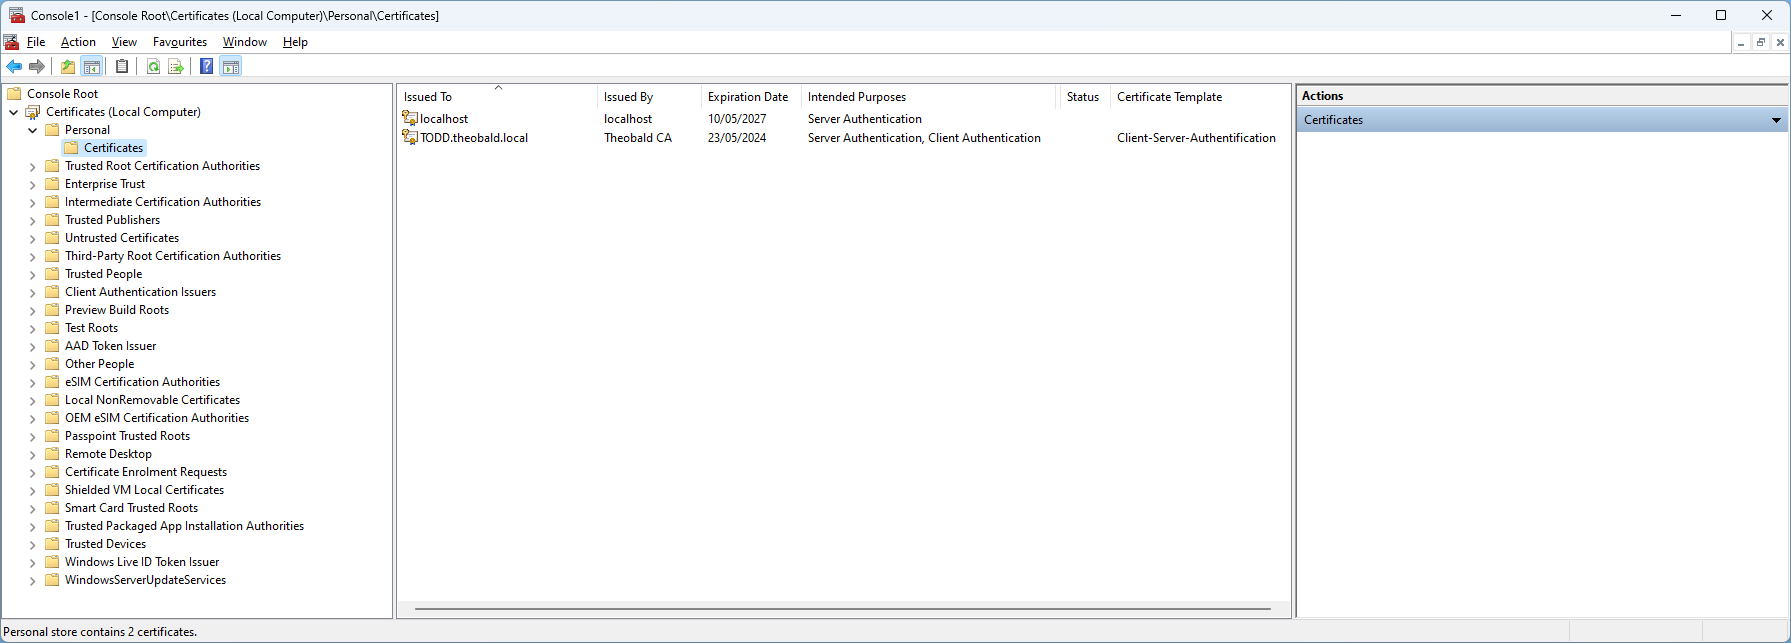
In the example shown, the server name is “TODD”:
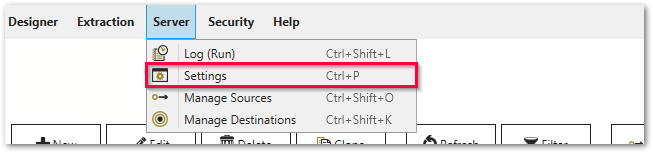
- Reference to the certificate in the Designer under Server > Settings > Tab Web Server > [Select X.509 certificate].
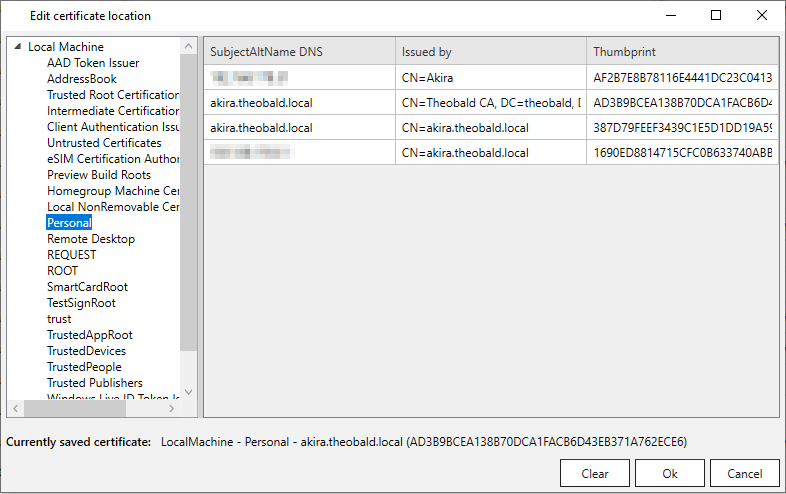
The name of the currently saved certificate is displayed at the bottom of the window.
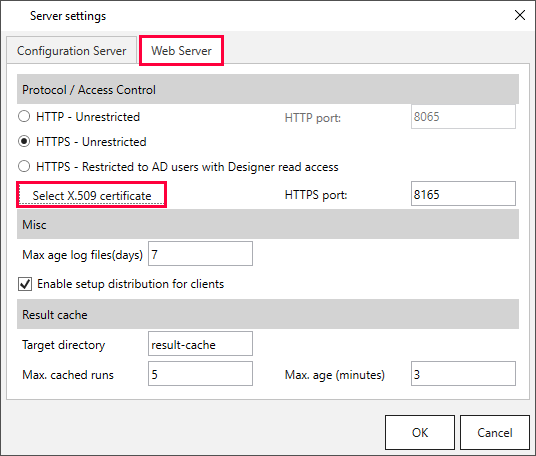
- Confirm with [OK]. The performed changes are activated by restarting the XU server.