Create Runtime Parameters #
Follow the steps below to create runtime parameters:
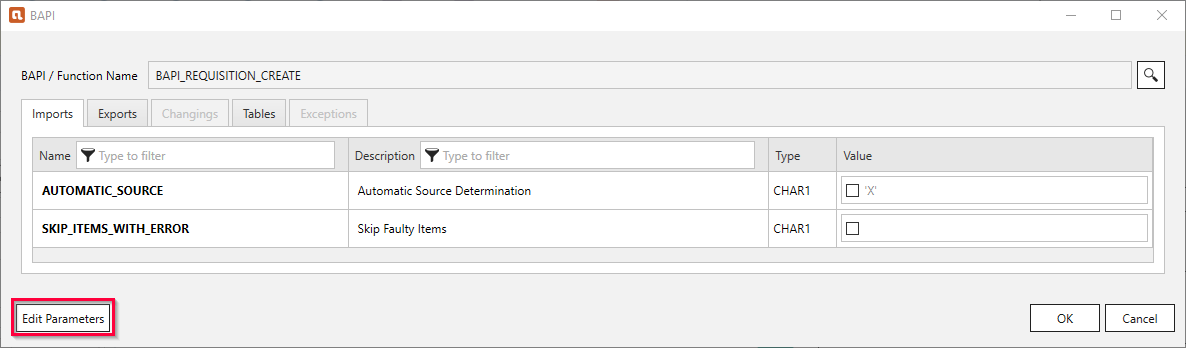
- In the main window of the component click Edit parameters.
The window “Edit Runtime Parameters” opens.
- Click [Add Scalar] to define scalar parameters to be used as placeholders for actual values.
Click [Add List] to define list parameters that contain multiple values separated by commas e.g., 1,10 or “1”, “10”.
The placeholders need to be populated with actual values at extraction runtime.
Tip: Parameter0..-n is the default naming for the added parameter. You can enter a name of your choice.
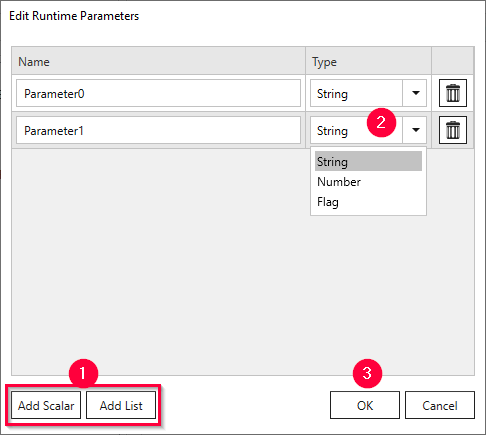
- Select one of the following data types from the drop-down menu.
The data types may correlate to SAP data types.
- Text: Can be used for any type of SAP selection field.
- Number: Can be used for numeric SAP selection fields.
- Flag: Can only be used for SAP selection fields, which require an ‘X’ (true) or a blank ‘‘ (false) as input value.
- List (string): Can only be used for SAP selection fields that allow multiple input values.
- Click [OK] to confirm.
Assign Runtime Parameters #
Follow the steps below to assign runtime parameters to input field:
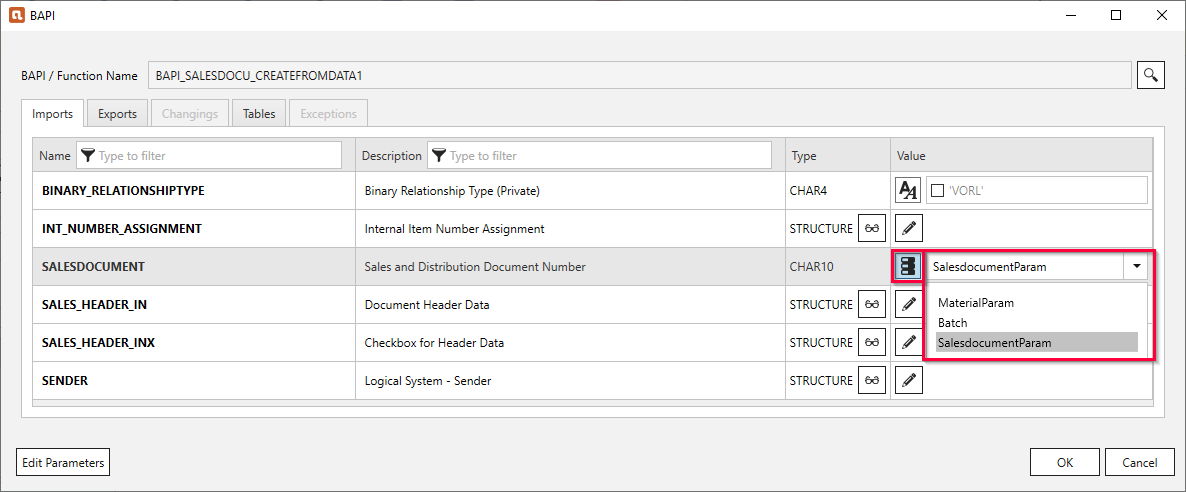
- Navigate to the item you want to parameterize in the Imports, Changings or Tables tab.
- Click the icon next to the item to switch from static values (
 ) to runtime parameters (
  ).
If no icon is available, create a runtime parameter.
).
If no icon is available, create a runtime parameter. - Select a runtime parameter from the dropdown-list.
How to Pass Values at Runtime #
Follow the steps below to replace runtime parameters with actual values at runtime:
- Create and assign runtime parameters in the Xtract component.
- Close the Xtract component.
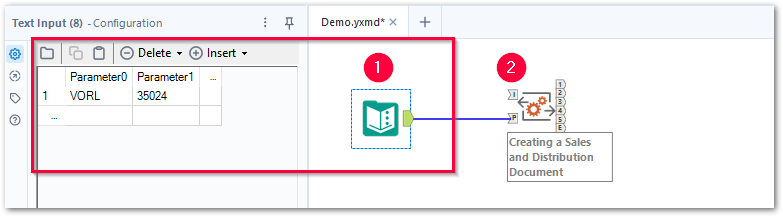
- Define the input values for the runtime parameters (1), e.g., single values or lists.
- Make sure that the data type of the input values match the data type of the corresponding runtime parameter.
- Make sure that the name of the input matches the name of the corresponding runtime parameter, e.g, the values of the input Parameter0 is automatically assigned to a runtime parameter by the same name.
- Connect the input to the Xtract component using the input anchor “P” (2).
To pass input tables, use the input anchor “I”, see Mapping Input Tables. - Run the workflow to test if the parameters are assigned correctly.
Note: Parameterization via input anchors is supported as of Xtract for Alteryx version 1.19. When using an older version of Xtract for Alteryx, parameterize Xtract components using batch macros, see Parameterizing via Batch Macros.