The following section shows how to use the Xtract Report component.
Look Up a Report or Transaction #
- In the main window of the component click
 . The window “Report Lookup” opens.
 - In the field Report Name (1) enter the name of a report using wildcards (*) if needed. Alternatively you can search for SAP Transaction Codes by selecting TCODE.
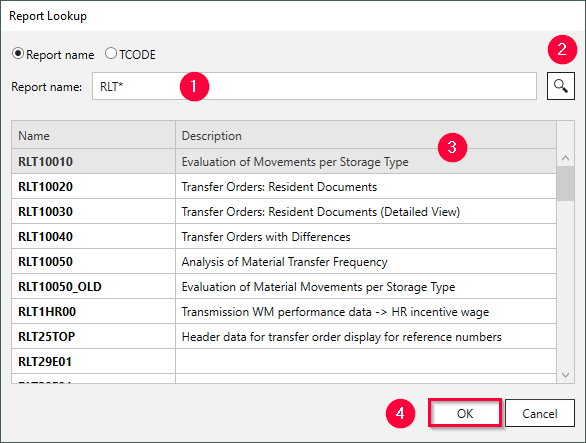
- Click and select the report of your choice from the displayed list (3).
- Click [OK] (4) to confirm.
Variants and Selections #
- Choose a variant from the drop-down-list Variant (1).
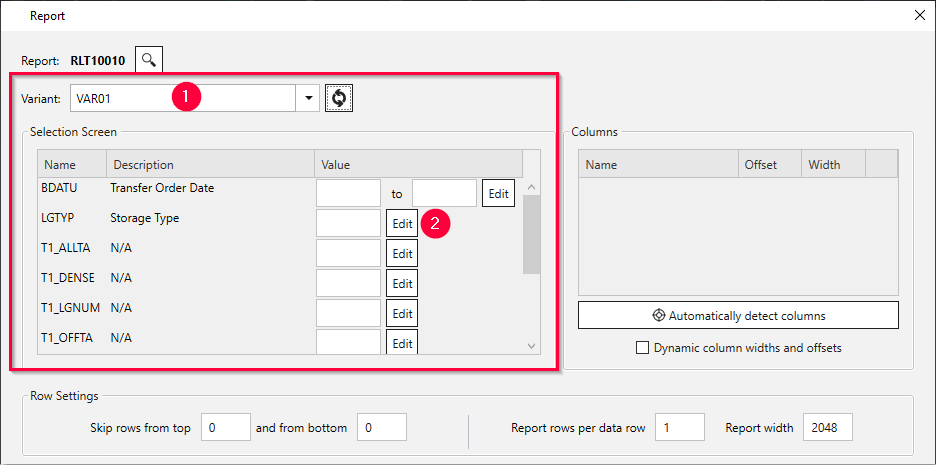
- Choose a selection criterion you want to change or dynamize from the list in the section Selection Screen (2).
- Click the [Edit] button next to the selection you want to edit. The window “Edit Selection” opens.
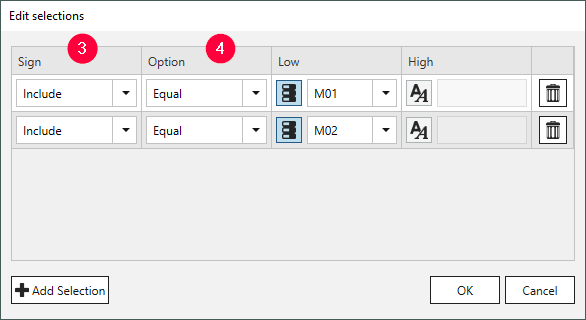
- Choose if the selection is to be included or excluded (3) from the extracted data.
- Select an operator (Equal, GreaterThan, etc.) from the Option drop-down list (4).
- Enter the selection in the respective Low and High fields. The High field is active for input when the between or not between operator was selected.
- Optional: click [Add Selection] (5) to add conditions.
- Click [OK] (6) to confirm the selections.
Note: For more information on variants and selections, see Variants and Selections.
Define Report Columns #
- Click ** [Automatically detect columns]** to execute the report based on the selected variant or selections and detect columns automatically.
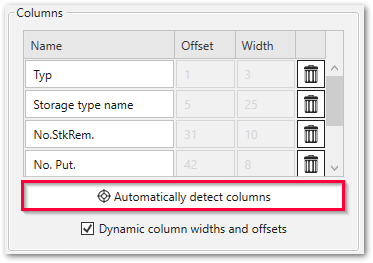
- Click [Load Preview] to display the rows in the preview screen.
- Check if the automatically detected columns are accurate. When automatic column detection is not possible, the report’s column names, widths and offsets must be set manually, see Define Columns manually.
Note: For more information on how to define report columns automatically and manually, see Define Columns.