Warning: Deprecated documentation
You are using the old version of the online help for ERPConnect.
Make sure to use the documentation within the new HelpCenter for ERPConnect.
Setting Up an RFC Destination #
To enable calls from an SAP system to a subsystem, the subsystem must be known to SAP.
This can be done with an RFC destination.
An existing RFC destination is necessary for sending IDocs.
- Use the transaction SM59 to create a new RFC destination.
- Fill the following fields of the destination:
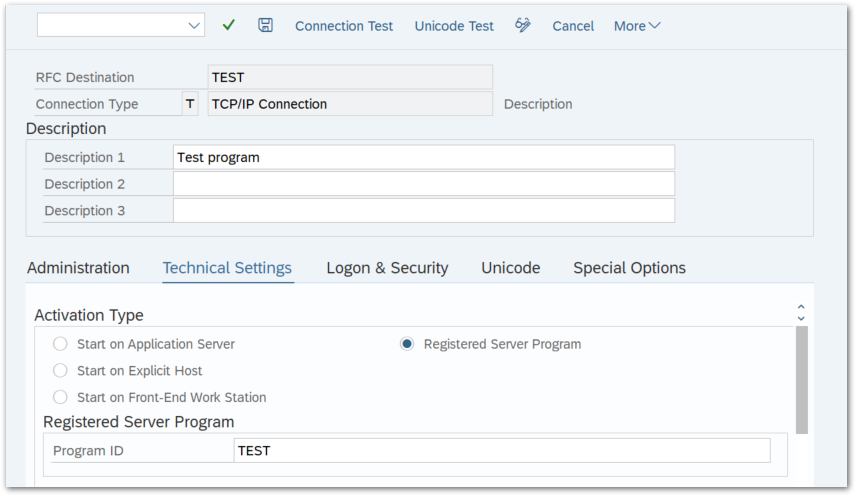
- Unique name of the new destination e.g., ERPTEST.
- Connection Type = T (for TCP/IP).
- Description.
- ProgramID: A unique name that the server program uses to register on the SAP gateway.
- Choose the option Registered Server Program.
- Save the destination.
- To test the RFC-Destination, click the button [Test Connection] while the program is running.
If everything works well, you should see a screen like the one below: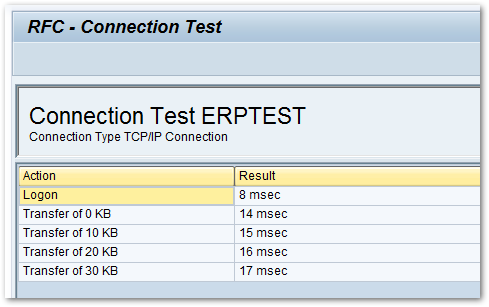
An example for a simple RFC server program can be found in section RFC-Server
Note: If the RFC Destination is set to Unicode, the property IsUnicode of the RFCServer object must be set to true.
Setting Up a Test Environment for IDocs #
To receive test IDocs, you can set up a test environment in your SAP system.
Follow the steps below to set up a test environment that can send MATMAS IDocs for distributing material master data:
- Define a Logical System to which the IDocs can be sent.
Use the transaction SPRO to open Customizing and follow the path SAP Web Application Server -> ALE -> Sending and Receiving Systems -> Logical Systems -> Define Logical System (this path is valid for Release 4.7). Create a new line and enter the name of the system e.g., ERPCONNECT and a short description. - Use the transaction SM59 to create an RFC Destination, see Setting Up an RFC Destination.
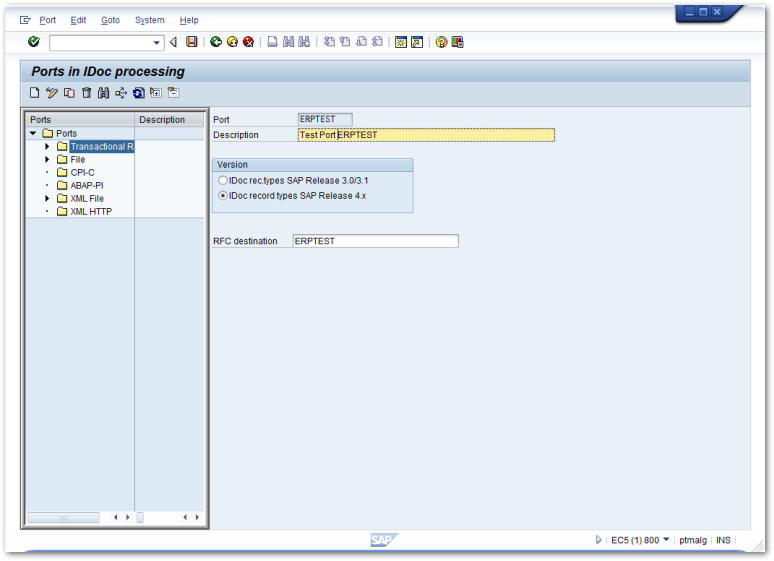
- Use the transaction WE21 to create a Transactional RFC IDoc Port.
The name of the port must be unique and refer to the RFC destination defined in step 2.
- Use the transaction WE20 to create a Partner Profile for the logical system created in step 1.
Add an outbound parameter using the [+] button. For this example select MATMAS as the message type, MATMAS05 as the IDoc basic type and enter the name of the port created in step 3 as the logical receiver port.

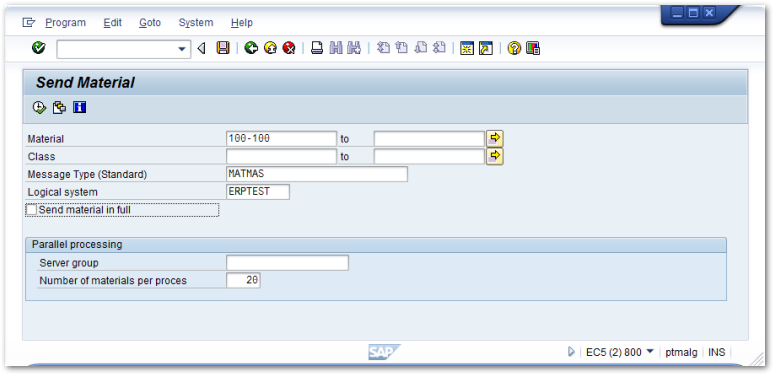
- Use the transaction BD10 to open the menu for sending IDocs.
Enter the logical system as shown in the figure below and run the program via [F8].
The IDocs are created and sent to the specified port.
Set Up Receiving IDocs #
The following instructions show how to customize your SAP system for processing IDocs and creating sales orders.
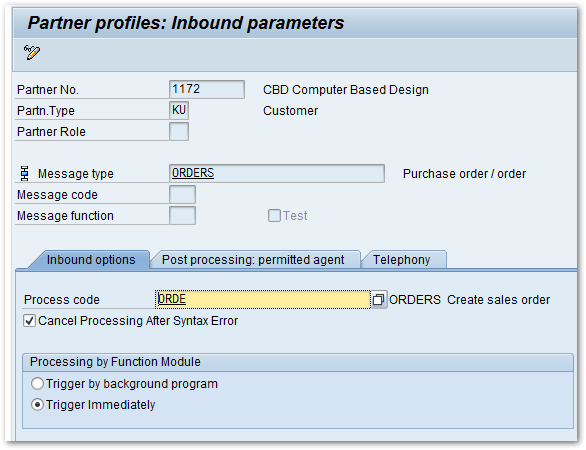
- Use the transaction WE20 to create a Partner Profile.
In case of a SalesOrder IDoc, the external system acts like a customer. The customer number is the appropriate partner number.
Use KU as the partner type.
- Add an inbound parameter and select ORDERS as the message type and ORDE as the process code.
That enables the SAP system to find the right routines for creating a sales order, when an IDoc is received.
- Use the transaction VOE2 to process the incoming data. The transaction creates a line in the EDSDC table.
Assign the following parameters for the customer number that sends the IDoc:
Sales organization, distribution channel, division, sales type.
