The following section shows how to use the DeltaQ component.
Look Up Extractors #
Follow the steps below to look up a DataSource. For information on how to look up Hierarchies, see Hierarchies.
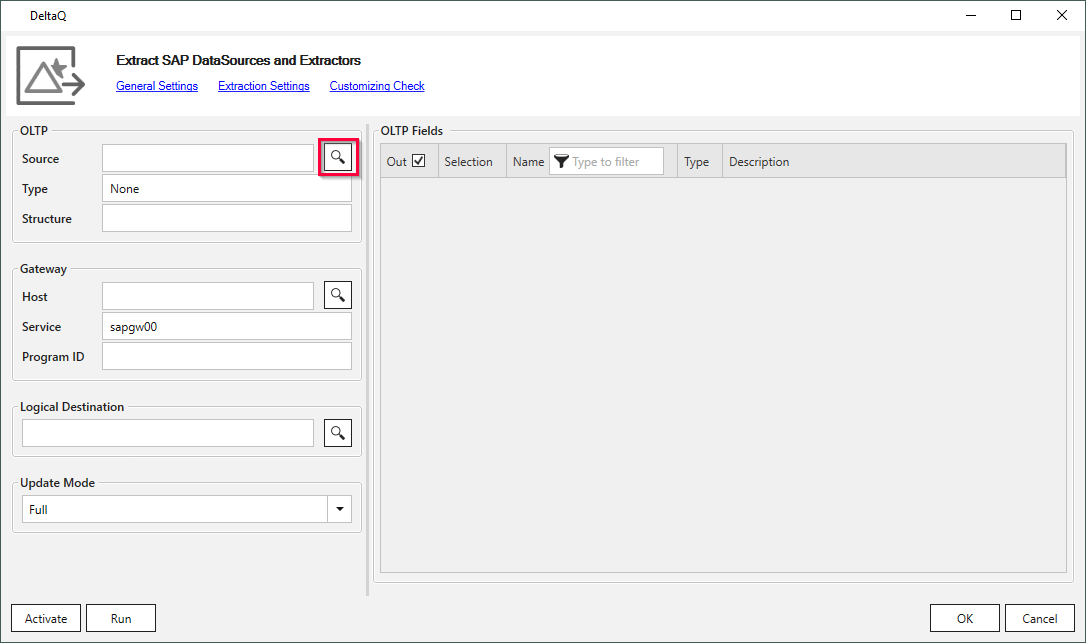
- In the main window of the component navigate to OLTP and click
 . The window “Look Up OLTP Source” opens.
- Enter the name of a DataSource in the field Name (1). Use wildcards ( * ), if needed.
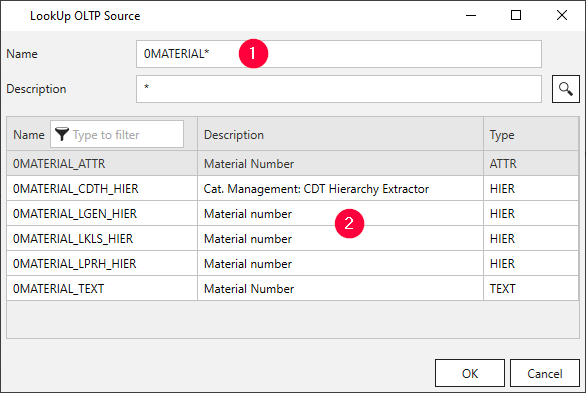
- Click and select the extractor of your choice from the displayed list (2).
- Click [OK] to confirm your selection.
The application now returns to the main window of the component.
Note: To search and find DataSources, make sure the DataSources are activated in SAP.
Defining the DeltaQ Extraction #
After looking up an extractor, follow the steps below:
- Navigate to Gateway and click (1) to look up an RFC destination.
For more information, see DeltaQ Customizing.
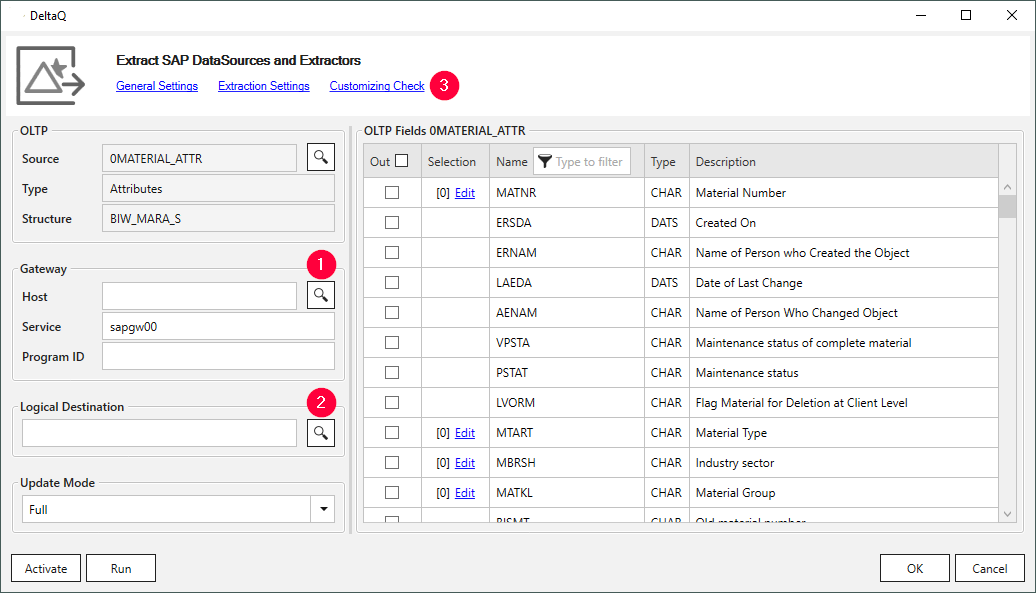
- Navigate to Logical Destination and click (2) to look up a logical RFC target system. For more information, see DeltaQ Customizing.
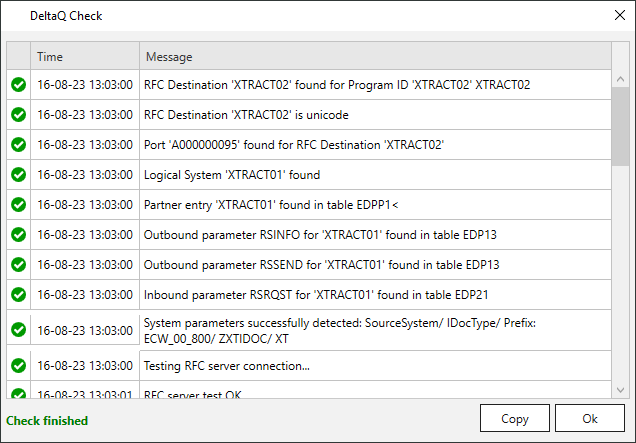
- Click Customizing Check (3) to validate the DeltaQ Customizing on the SAP system.
Make sure that all check marks are green. For more information, see DeltaQ Customizing.
- Select an Update Mode, e.g., to initialize delta extractions.
- Select the items to add to the output.
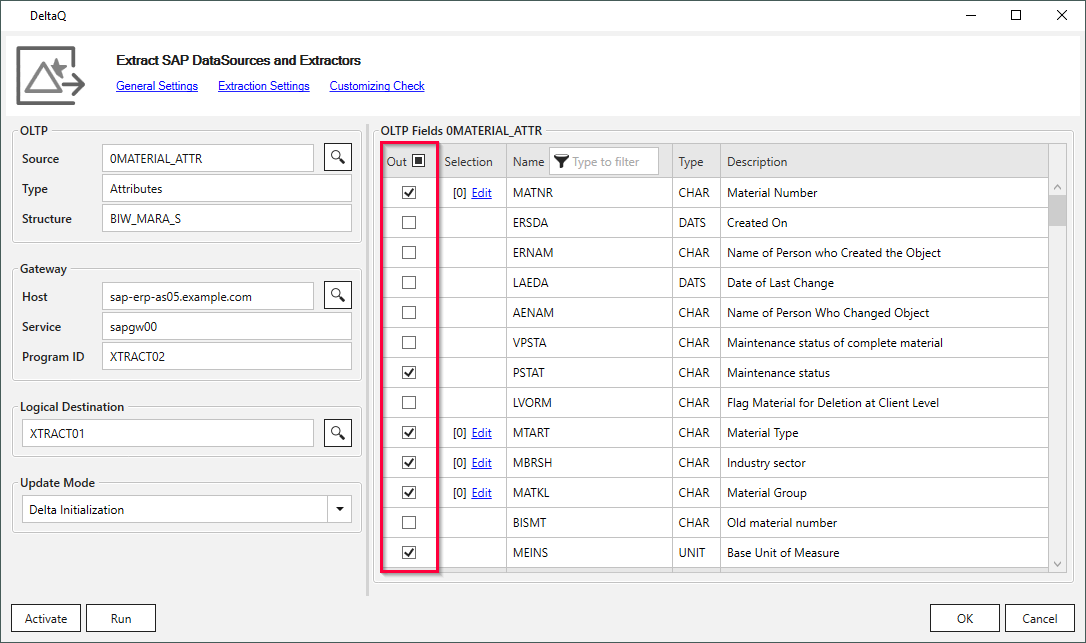
- Optional: click the [Edit] option next to an item to add filters.
- Click [Run] to testrun the extraction and validate your settings.
- Click [Activate] to activate the extraction in SAP. After a successful activation, a corresponding status message opens:
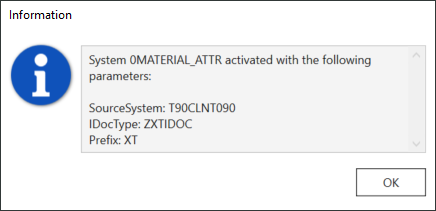
Note: The activation is only required for the update modes Delta, Full or Init. Do not activate the extraction for the Delta Update mode.